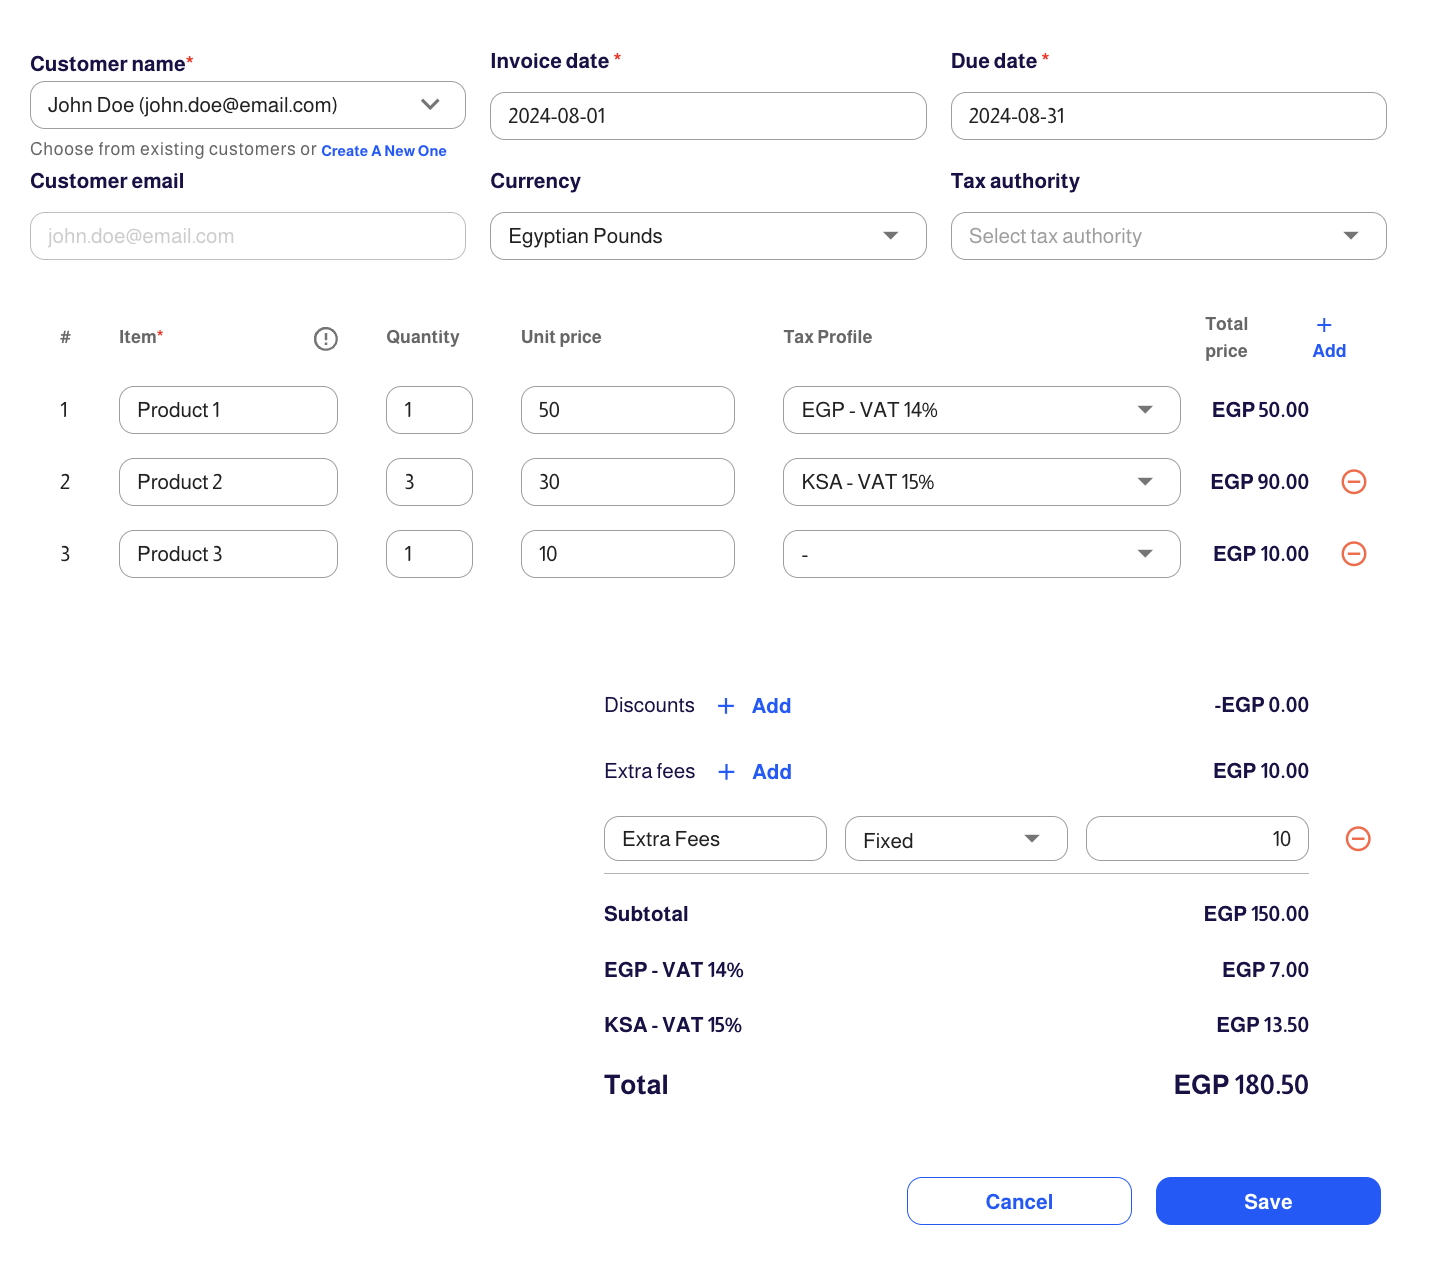
Create an Invoice
Subsbase allows you to generate invoices automatically or manually. This guide will walk you through the process of manually creating an invoice in the Subsbase platform.
Manually Created Invoice
If you need more control over your invoicing, Subsbase allows for manual invoice creation. These manually created invoices are initially saved as drafts, which can be freely edited until validated. Once an invoice is validated, it becomes an "Open" invoice and can no longer be edited.
You can manually create an invoice in Subsbase through the Admin Portal using one of the following methods: Invoices or Drafts in the Invoicing page, or the Invoices tab in Customer Profiles.
1. Navigate to the Admin Portal
- Choose one of the following paths:
- Invoicing Page > Invoices > click Create Draft Invoice.
- Invoicing Page > Drafts > click Create Draft Invoice.
- Customers Page > select a customer profile > go to the Invoices tab > click Create Invoice.
2. Select or Create a Customer
- Choose an existing customer from the list, or
- Click Add Customer to create a new customer by filling in their required details.
3. Set Invoice Details
- Choose the Invoice Date (the date the invoice is generated).
- Set the Due Date (the date payment is due).
- Select the Currency.
- Optionally, select a Tax Authority (for tax compliance).
For more details on integrating with tax authorities, refer to Configuring Taxes.
4. Add Line Items
- Enter the line items by providing the following details:
- Item name: description of the product or service.
- Quantity: number of units.
- Unit price: price per item.
- Choose a Tax Profile if applicable.
For more details on configuring tax profiles, refer to Tax Profiles.
5. Apply Discounts or Additional Fees
- Optionally, apply any Discounts or Extra Fees to the invoice.
6. Save the Draft Invoice
- After completing the details, click Save to save the invoice as a Draft.
- Draft invoices can still be edited until they are validated.
7. Validate the Invoice
- To finalize the invoice, navigate to the draft invoice and click Validate.
- Once validated, the invoice will move to Open status and is no longer editable.
For more information on handling draft invoices, see Draft Invoice Actions.

For more details about creating and managing invoices in Subsbase, please refer to Invoing.