Schedules
Overview
- Subsbase allows you to customize your billing frequency for your customers through payment schedules.
- You can also have customized billing dates for each customer with auto-calculated scheduled payments.
- You can even create templates to be used later on when creating new payment schedules.
Scheduled Payments Statuses
| Status | What does it mean? |
|---|---|
| CANCELED | The scheduled payment was terminated before processing. |
| FAILED | The payment attempt during scheduling encountered an error or failure. |
| NOT PAID | The scheduled payment has not been completed or initiated. |
| OVERDUE | The scheduled payment is past its due date and remains unpaid. |
| PAID | The scheduled payment was successfully processed and completed. |
| PARTIALLY PAID | The scheduled payment was initiated and partially paid but not fully settled, leaving an outstanding amount of the total amount due. |
| PROCESSING | The scheduled payment is currently in progress, awaiting a response from the payment gateway. |
To create a new payment schedule in your Subsbase site, go to the Schedules page on your Admin Portal, then click the Create Payment Schedule button, and fill in the following fields:
Creating a New Payment Schedule
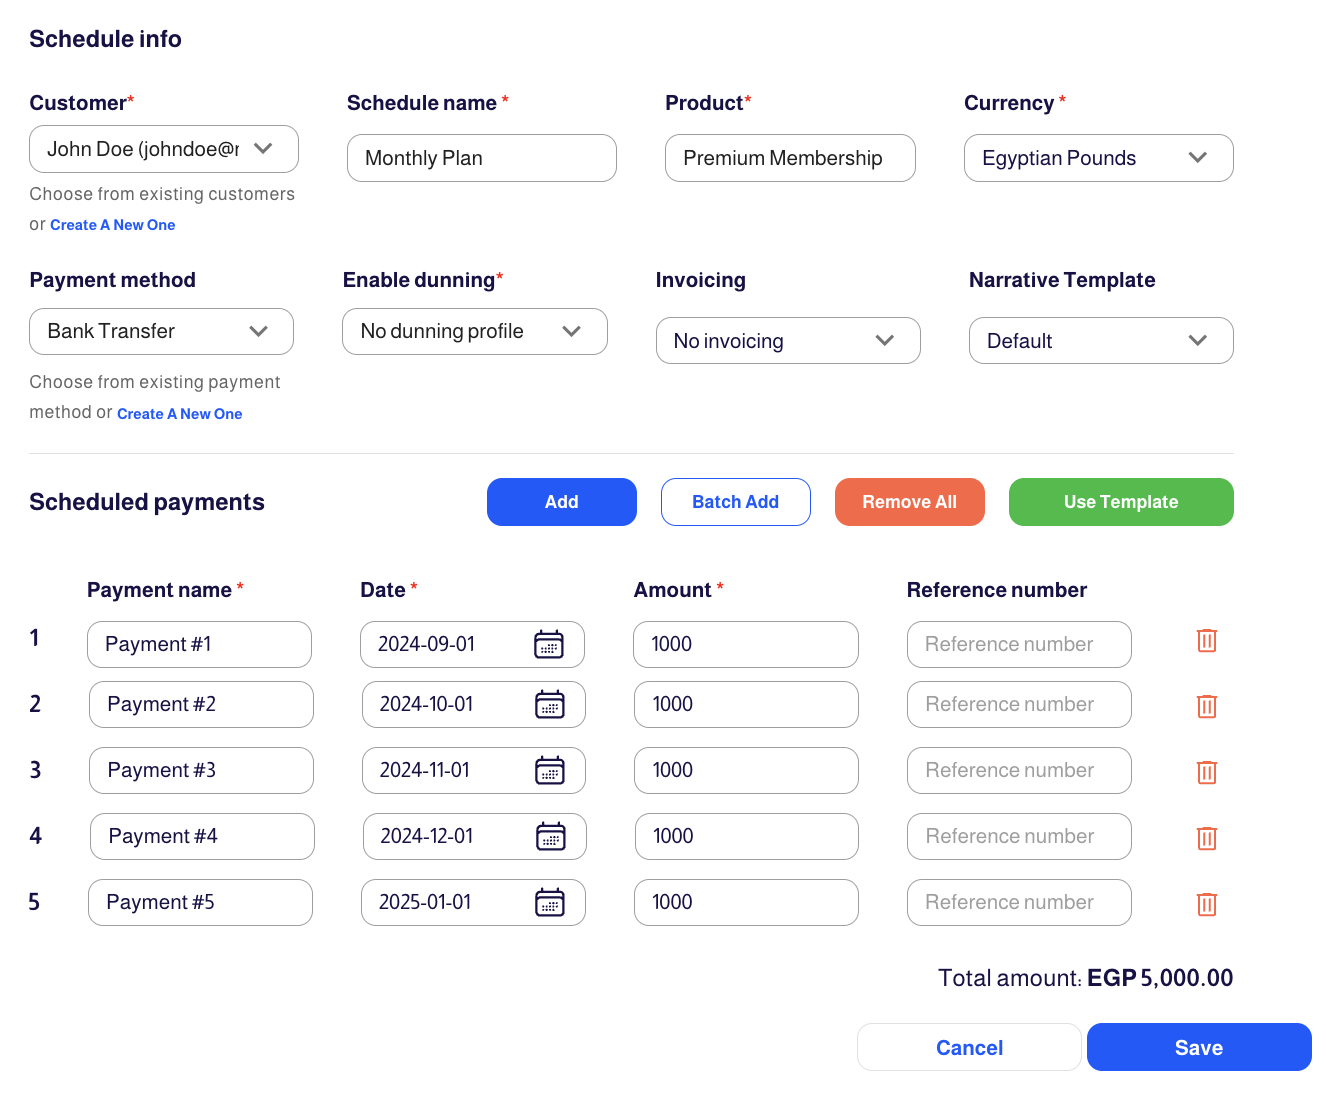
Schedule Info
Customer
- You can choose from "Existing Customers" or "Create A New One."
- Creating a new customer can be done by either clicking "Create A New One" or from the Customers page.
Schedule Name
- This is the name of your schedule that will be shown to your customers on the Customers page.
- The Schedule Name is not required to be unique and can be shared among payment schedules. However, it is recommended to use a unique name for ease of schedule referencing.
Product (Product Name)
- This is the name of your product that will be shown to your customers on the Customers page.
- Product (Product Name) is not required to be unique and can be shared among payment schedules. However, it is recommended to use a unique name for ease of product referencing.
Currency
- Subsbase supports 21 currencies, across its gateway integrations, to choose from while creating new payment schedules.
- However, each site can have different allowed currencies, which will be the only available ones to choose from in the currency dropdown while creating the payment schedules.
Payment Method
- This is an optional field at this stage, as the payment method can also be chosen during the checkout process.
- However, if you decided to select the payment method here, you have to select the customer first.
- In the Payment Method dropdown, you have several options to choose from:
- Select from existing payment methods.
- Create new payment methods.
- Request your customer to add a new payment method.
- When dealing with existing payment methods, you are limited to adding those already stored in the selected customer's profile.
- The option to request a new payment method from your customer is available by selecting "Request New."
Enable Dunning
- Subsbase provides you with the dunning feature to help recover failed payments.
- You have the option to select either from "Existing Dunning Profiles" or "Create A New One." Choosing the latter will guide you to the Dunning Profiles section within the Settings page, where you can create a new profile.
For more detailed information about creating and managing dunning profiles in Subsbase, please refer to Dunning Profiles.
Invoicing
- By default, this field is set to "No Invoicing".
- Every billing event generates transactions within Subsbase, accessible through the Transactions page. However, it is important to note that not each of them requires an invoice.
- Therefore, when creating your payment schedule, you have three invoicing options to choose from:
- No Invoicing: This option entails the creation of only a transaction on the Transactions page when the scheduled amount is paid. No invoice will be generated.
- Collective Invoice: This option entails the creation of a collective invoice for the total value of all scheduled payments combined.
- Per Payment Invoice: This option entails the creation of an invoice for each scheduled payment as it becomes due.
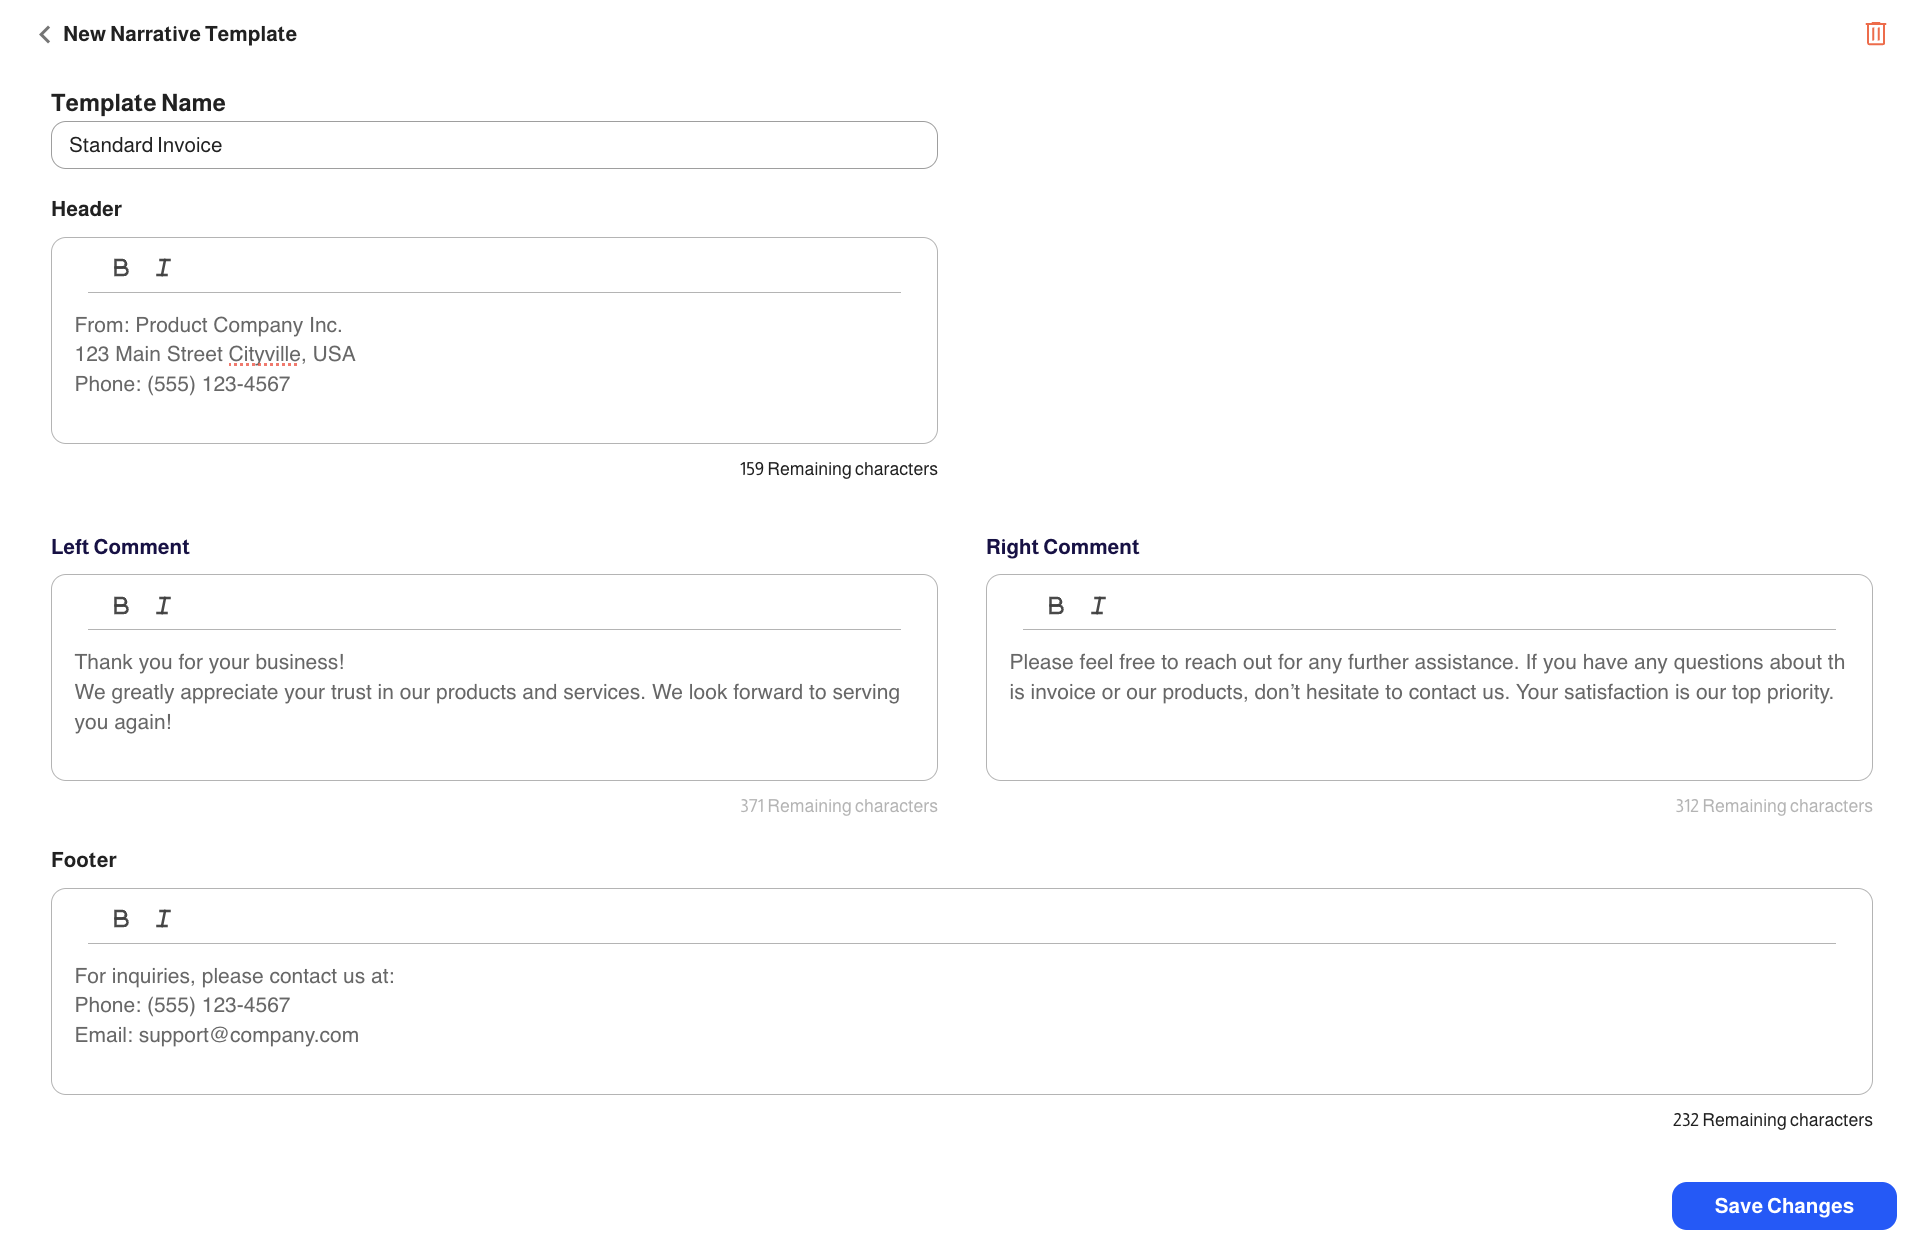
Narrative Template
- You can tailor the descriptive content of your invoices, such as payment terms and thank-you messages, by selecting a narrative template that fits your requirements.
- When setting up your payment schedule, choose the desired template from the Narrative Template dropdown, which includes options you have configured in the Site Settings.
- Once selected, any invoices generated from these plans will automatically feature the chosen narrative. The narrative will appear in the Invoice's Narrative tab for your review.
Configure Narrative Templates in Site Settings
- Set up the Invoice Narrative Template in your Site Settings via the Admin Portal, or manage it using the APIs.
Localization Settings
- You have the ability to translate invoice narrative templates, allowing your customers to seamlessly switch between languages across the Admin Portal, Checkout, and Customer Portal pages.
- Any field marked with the localization icon can be customized to different languages.
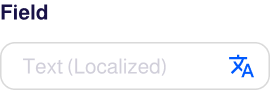
- Click the icon to access the Localization Settings, where you can enter translations for each language.
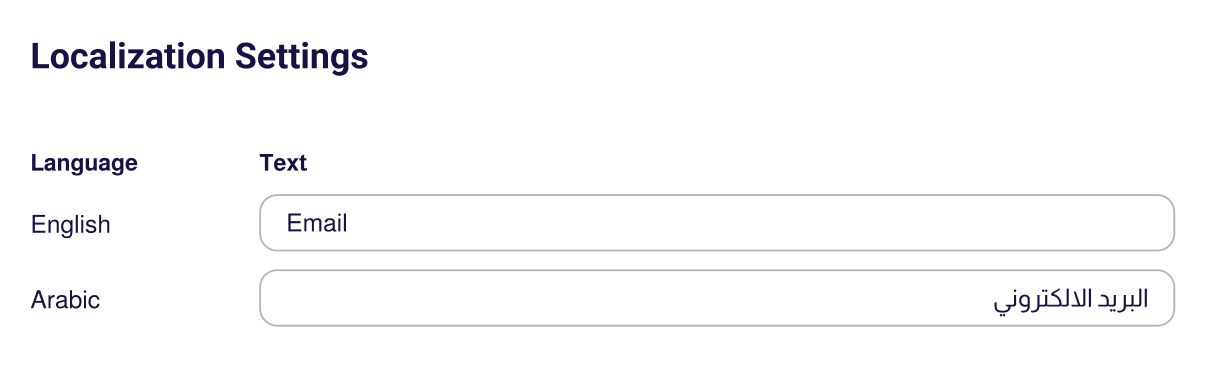
To enable localization, admins must first set the site's language preferences in the Admin Portal under Site Settings > Language Settings. This step ensures that the Localization Settings work properly across all interfaces.
Scheduled Payments
Once you have completed the necessary details within the "Schedule Info" section, you will be presented with three choices for setting up your scheduled payments: Add, Batch Add, and Use Template.
Add
- Adding scheduled payments one by one.
Batch Add
- The Batch Scheduled Payments feature enables the efficient creation of multiple repetitive scheduled payments.
Use Template
- Instead of creating scheduled payments from scratch, you can use one of the already-made templates.
- To create a new template on your Subsbase site, go to Schedules > Templates, and then click the Create Template button.
Creating a New Schedule Template
- Go to the Schedules page in your Admin Portal and access the Templates section.
- Click the "Create Template" button to start creating a new template.
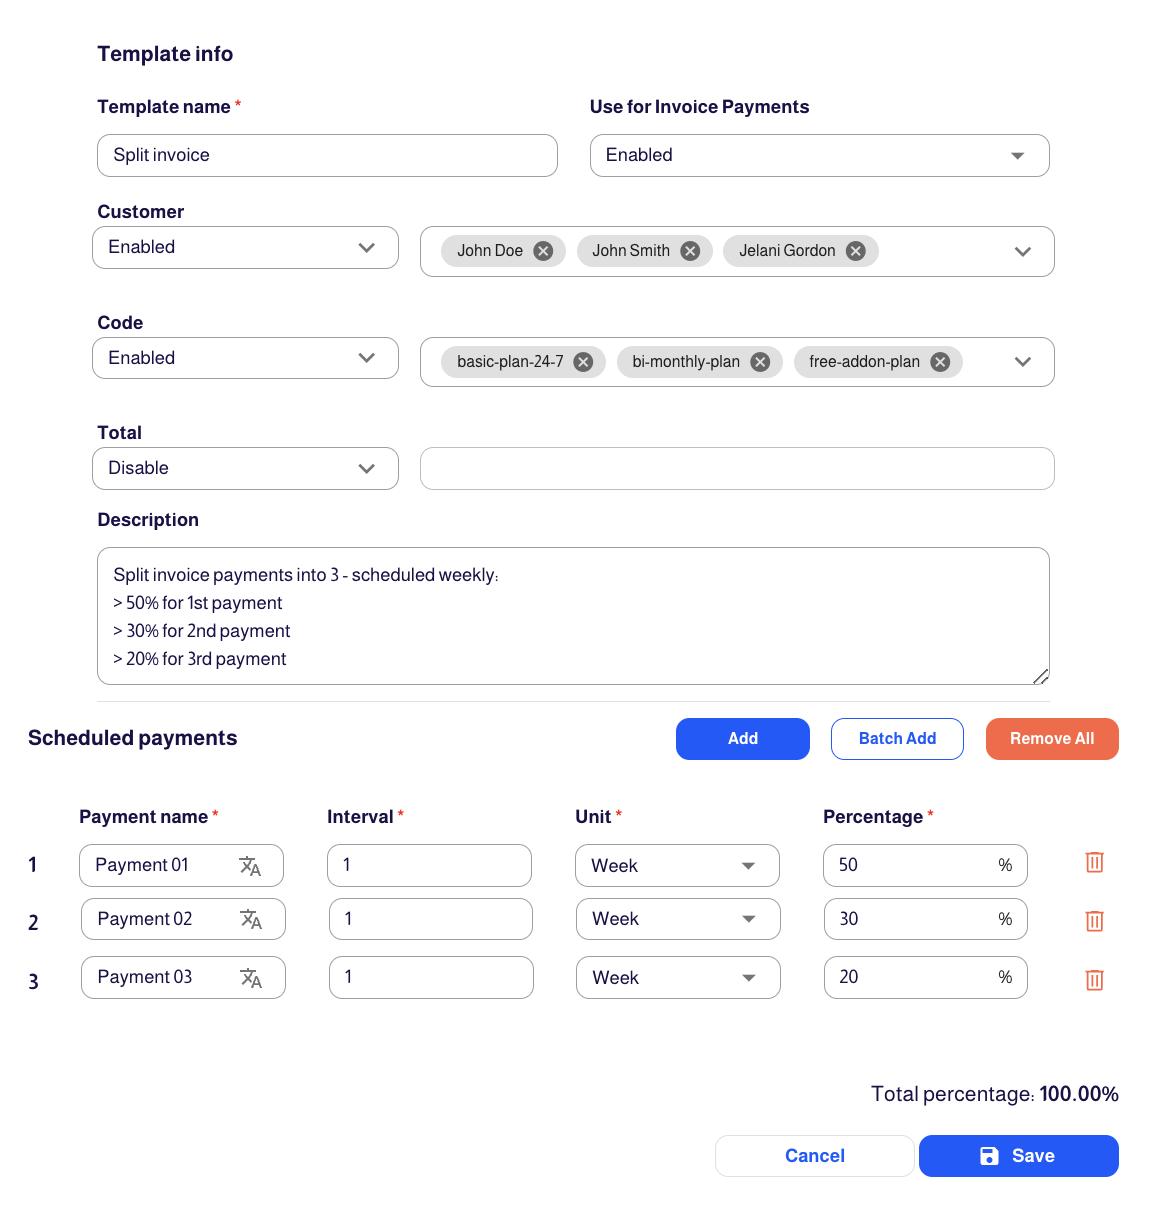
- In the "Template Info" section:
- Enter a name for the template in the "Template Name" field.
- For the "Use for Invoice Payments" field, select "Enabled" if you want this template to be used for invoice payments.
- In the "Customer" section, select "Enabled" if you want this template to be visible to customers in the Customer Portal.
- In the "Code" section, select "Enabled" if you want to associate a relevant plan or one-time payment code with this template.
- In the "Total" section, you can choose whether to enforce a minimum total amount for the scheduled payments. If you select "Disable", the system will not require the total amount of all payments to meet or exceed the full invoice amount. However, if enabled, the system ensures that the combined total of the payments is at least equal to the invoice amount.
- In the "Description" field, provide a brief description of the template, such as the purpose or any specific instructions.
- In the "Scheduled Payments" section, you can add multiple scheduled payments by filling in the following fields:
- "Payment Name": Enter a name for each scheduled payment.
- "Interval": Specify the numeric value of the interval.
- "Unit": Select the time unit for the interval (e.g., Week, Month).
- "Percentage": Enter the percentage of the total that should be paid for each scheduled payment.
- Once you've added all the scheduled payments, the "Total percentage" field at the bottom should show 100%.
- Finally, click the "Save" button to create the new Schedule Template.
Template Visibility and Total Percentages
- When the "Customer" field is enabled and the "Use for Invoice Payments" field is set to "Enabled," the total percentages of the scheduled payments must equal 100%. This requirement ensures that the template can be saved and displayed correctly in the Customer Portal.
- If the "Customer" field is disabled (indicating the template will not be visible to customers in the Customer Portal), the admin can input total percentages exceeding 100%. These templates are editable later by the admin as needed.
Managing Schedule Profiles
Once you have completed the steps for creating a new payment schedule, you can proceed to open the schedule and further configure additional details.
Scheduled Payments Tab
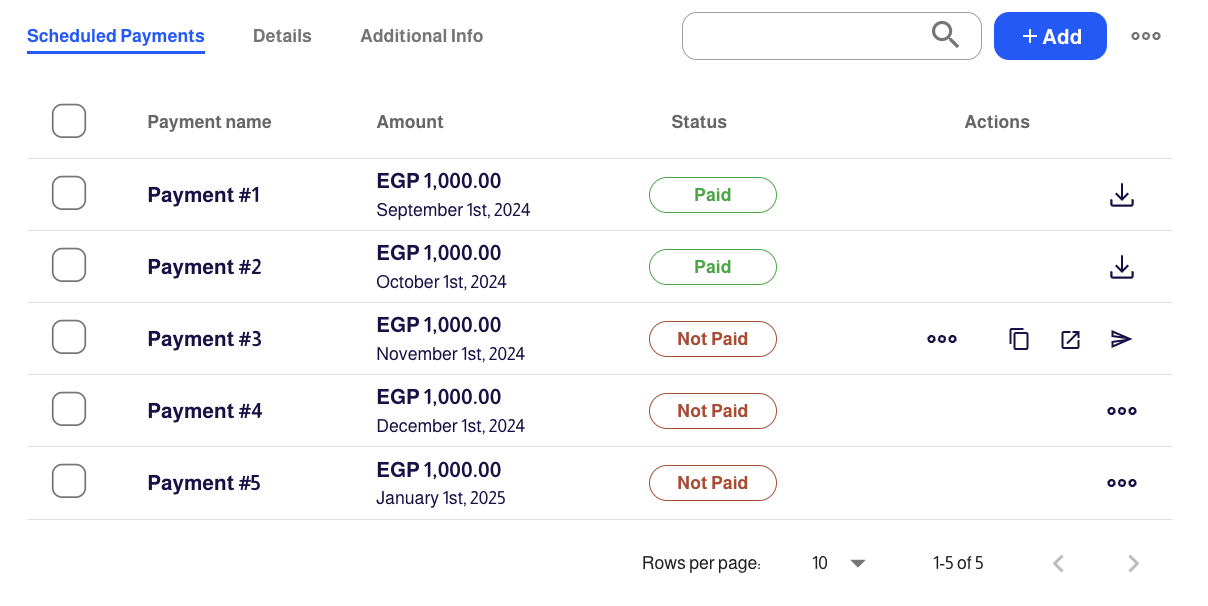
Within the "Scheduled Payments" tab you have the ability to:
- Keep track of the amounts need to be paid on a schedule.
- Send a payment link to your customer for a scheduled payment.
- Add a new payment to your schedule if the invoicing configuration is set to "No Invoicing" or "Per Payment Invoice."
- Export, Mark as Paid, or Delete any of your scheduled payments.
Details Tab
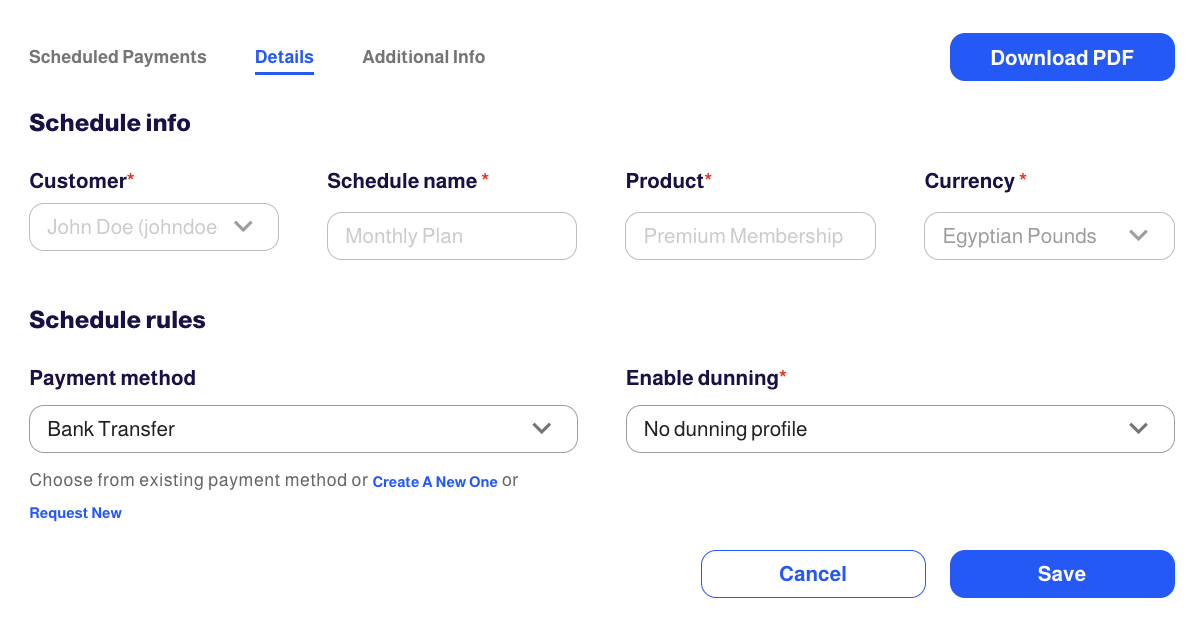
Within the "Details" tab you have the option to:
- Download the scheduled payments from the "Download PDF" button.
- Update the schedule detials, except for the disabled fields which cannot be edited.
Localization Settings
- You have the ability to translate schedule's info in your payment schedules, allowing your customers to seamlessly switch between languages across the Admin Portal, Checkout, and Customer Portal pages.
- Any field marked with the localization icon can be customized to different languages.
- Click the icon to access the Localization Settings, where you can enter translations for each language.
To enable localization, admins must first set the site's language preferences in the Admin Portal under Site Settings > Language Settings. This step ensures that the Localization Settings work properly across all interfaces.
Additional Info Tab
- The "Additional Info" tab provides a comprehensive space for additional details related to a schedule. This tab is divided into two sections: Custom Fields and Attachments.
- Attachments in schedules can be managed via Attachments APIs, and Custom Fields in schedules can be managed via Payment Schedules APIs.
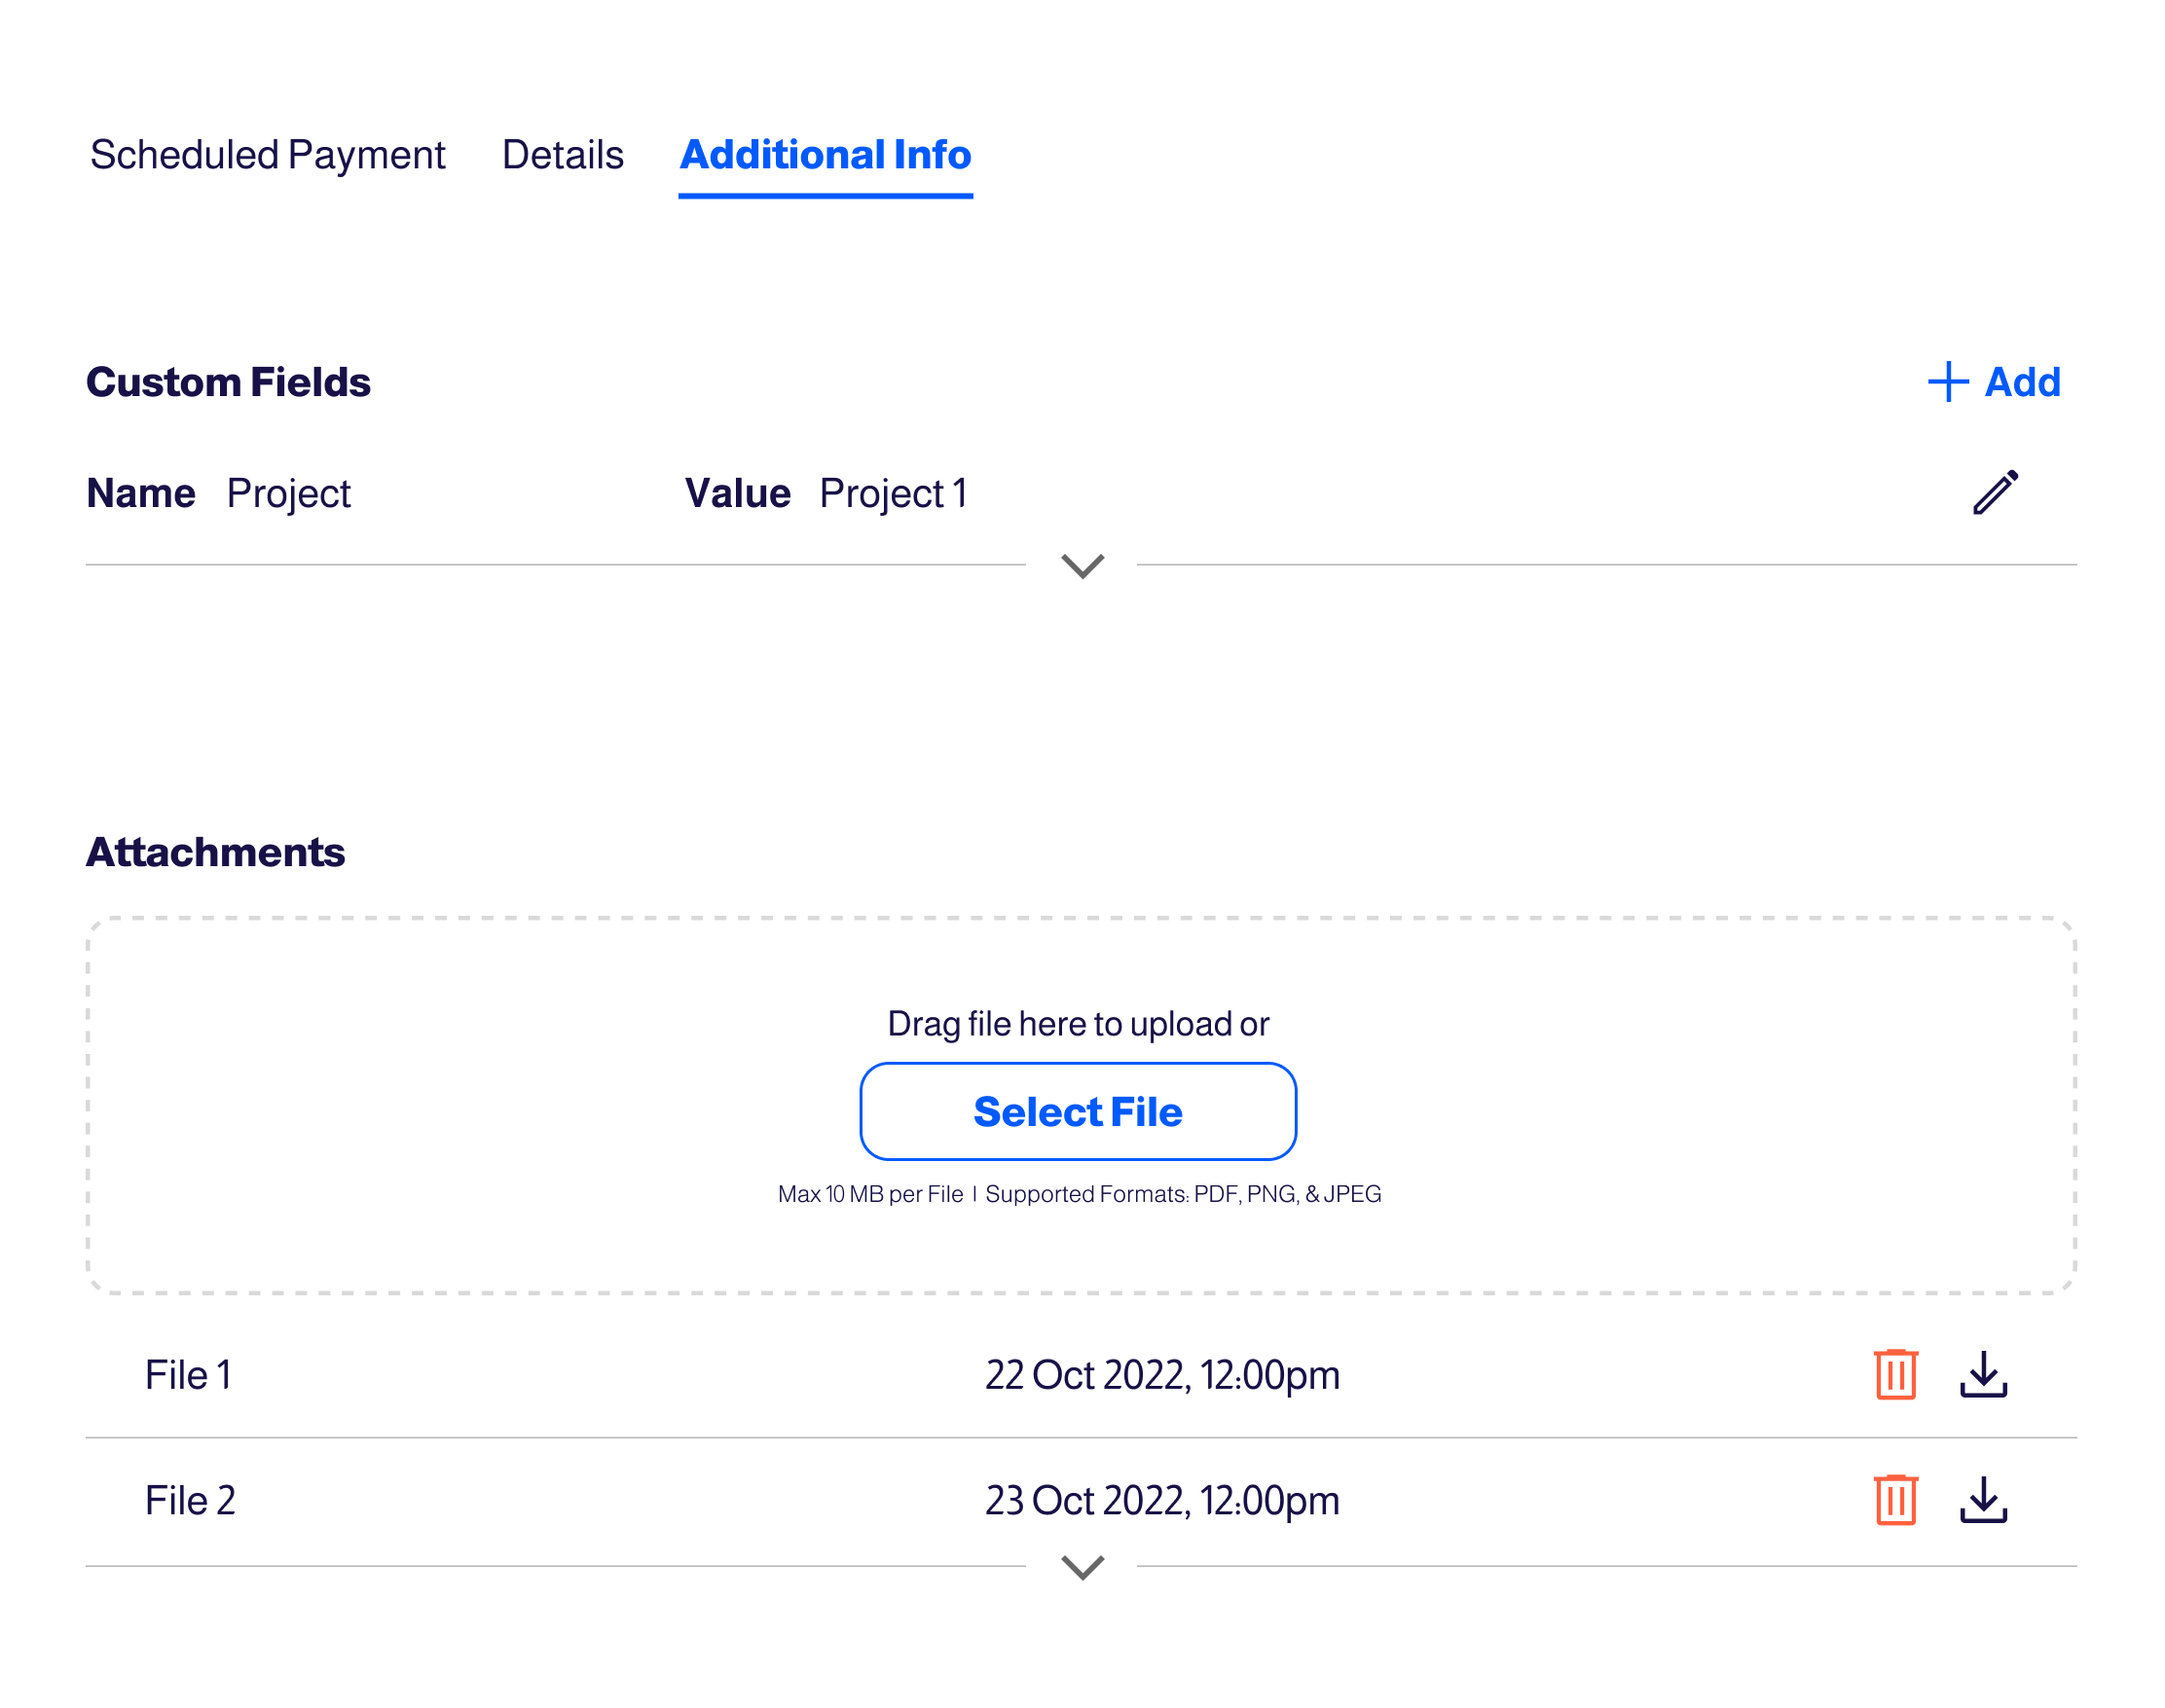
Attachments
- Admins have the ability to attach files directly to a schedule. This feature facilitates the inclusion of supporting documents or additional information related to the schedule. Each attachment is subject to a maximum size of 10MB and supports the following formats: PDF, PNG, and JPEG.
- For group uploads, the total size must not exceed 30MB. You can attach multiple files, each within the 10MB limit, without any cumulative size limitations.
Listing Page Actions
Export CSV
- By clicking the "Export CSV" button on your Payment Schedules page, you can view a comprehensive list of all payment schedules present on your site.
View Settings
Through the "View Settings" icon, you can customize the way your payment schedules list is displayed according to your preferences.
Search and Sort by
Search
- Payment schedules can be searched by Schedule Name and Product Name.
Sort by
- You can sort payment schedules by Schedule Name, Product Name, or Created On.
- And by clicking on the arrows next to them, you can switch between ascending and descending orders.