Create a New Plan
Creating a new plan in Subsbase is a simple process. Follow these steps to efficiently set up your plan and get it ready for your customers.
Start by logging in to your Subsbase Admin Portal and navigating to the Plans page. Click the "New Plan" button to start creating your plan.
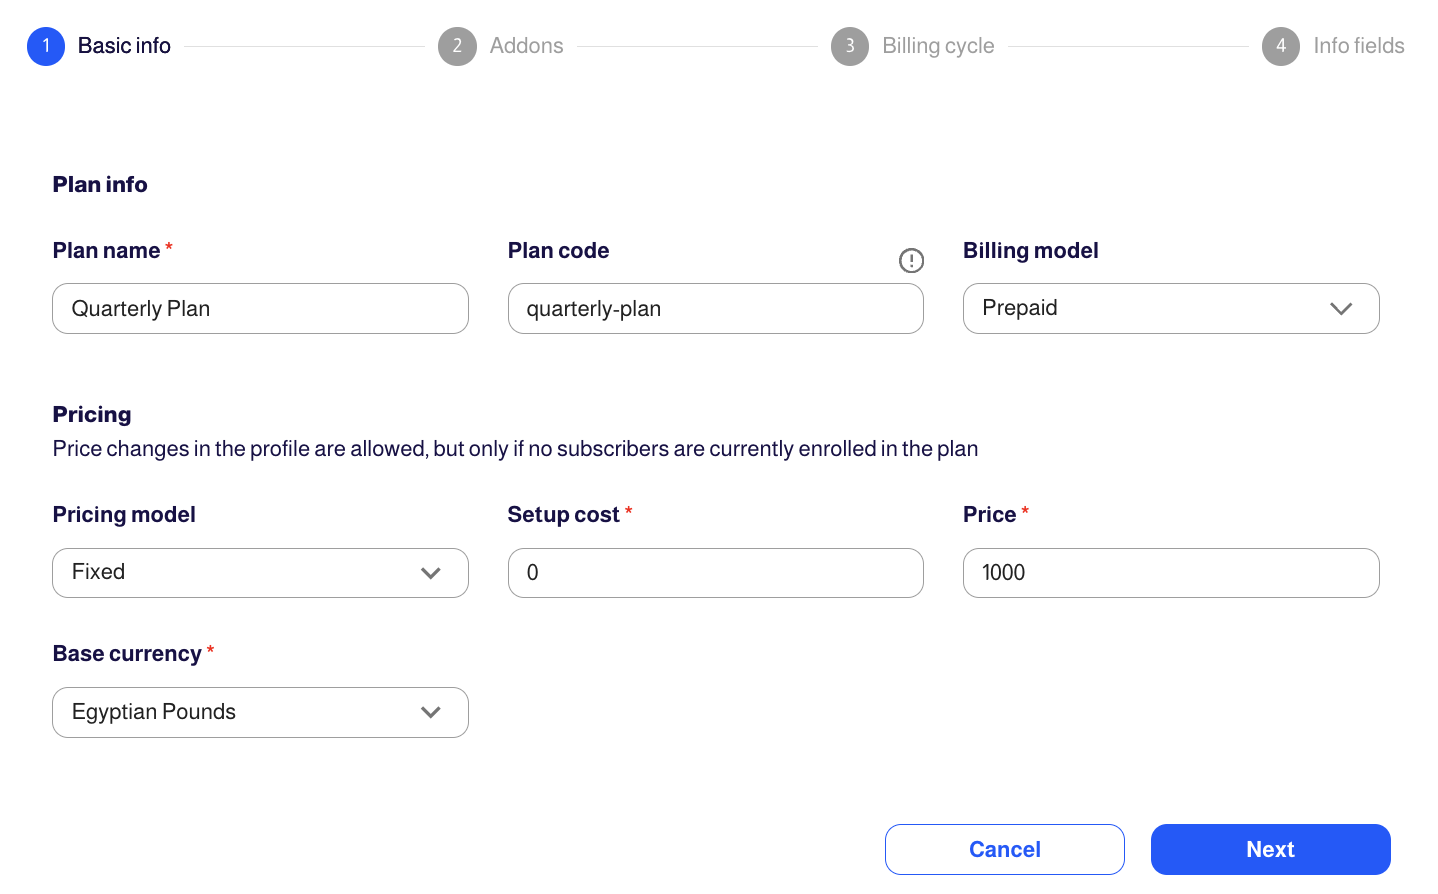
1. Enter Basic Information
- Plan Info: Fill out the basic details about your plan.
- Plan Name: Specify the name that will appear on the admin portal, customer portal, plan checkout and invoice line items.
- Plan Code: This unique identifier is auto-generated from the plan name but can be edited. Use lowercase alphanumeric characters only.
- Billing Model: Choose between Prepaid (charge in advance) or Postpaid (charge at the end of the billing cycle and can be charged based on usage or consumption).
Learn more about the billing models here. - Pricing Model: Select from six pricing models: Free, Fixed, Per Unit, Tiered, Volume, or Stair Step.
Learn more about the pricing models here. - Setup Cost: Enter a one-time fee that will be charged at the start of the subscription. If no setup cost is needed, enter "0".
- Price: Set the price according to the selected pricing model. The amount and structure will vary depending on the model you choose.
- Base Currency: Define the default currency for pricing.

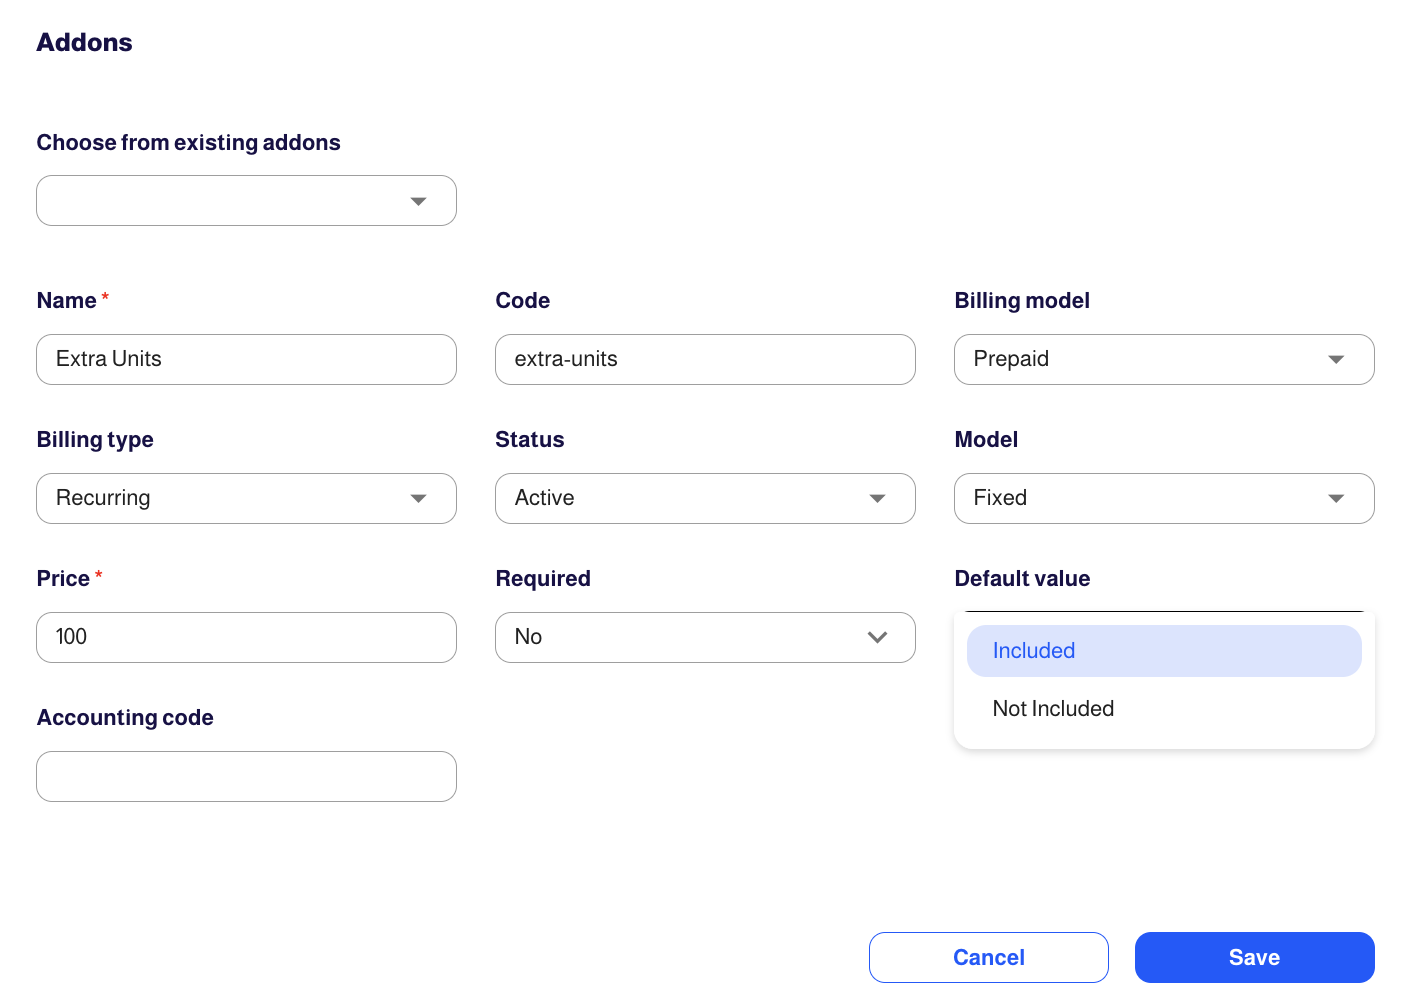
2. Add Addons
- Choose/Add Addons: Add additional products or services to your plan.
- Name: Provide a name for the addon.
- Code: Auto-generated unique identifier for the addon.
- Billing Model: Select Prepaid or Postpaid for the addon.
- Billing Type: Choose One-time or Recurring charges.
- Status: Set as Active or Inactive.
- Model: Select the pricing model for the addon (Fixed, Per Unit, Tiered, Volume, Stair Step).
- Price: Specify the cost of the addon.
- Required: Select whether the addon should be mandatory or optional for customers.
If "Required" is set to "No," the "Default Value" field will appear:
- Default Value: Choose "Included" to have the addon pre-selected at checkout, or "Not Included" to leave it optional for the customer.
- Accounting Code: Enter the relevant accounting code.

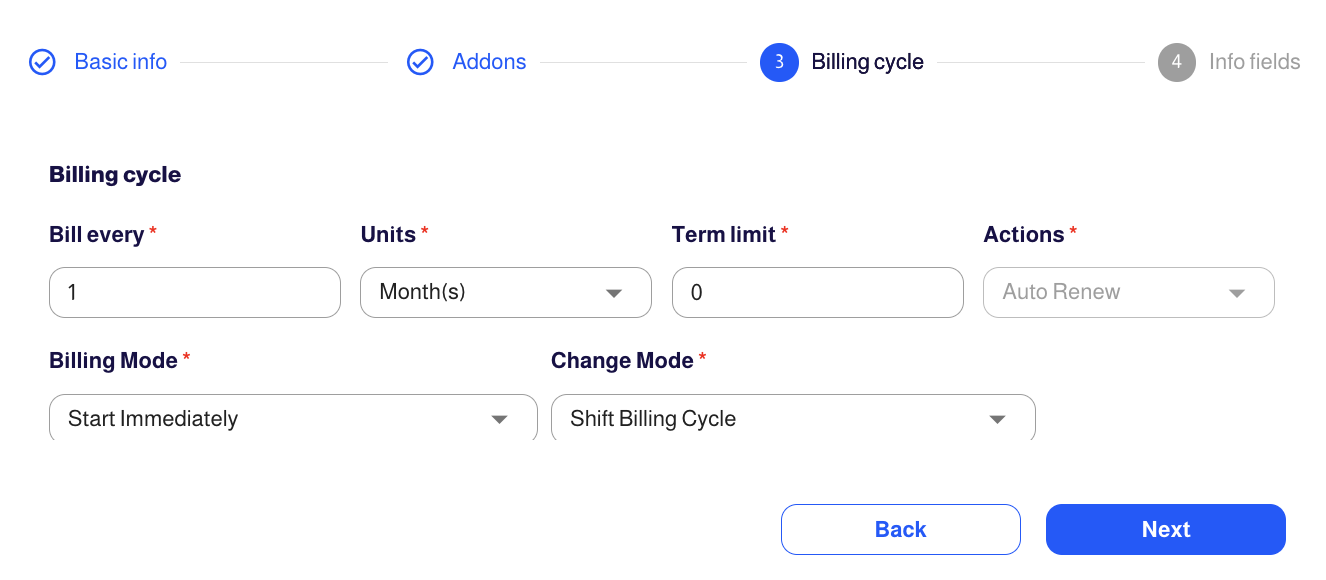
3. Configure Billing Cycle
- Billing Every: Define the billing period (e.g., monthly, quarterly).
- Term Limit: Set the subscription term limit or enter "0" for the subscription to automatically renew and never end.
- Actions: Choose between Auto Renew or Cancel, depending on the term limit.
- Billing Mode:
- Option 1: Start Immediately
- Maintain Billing Cycle: The customer starts the new plan immediately, with charges prorated to the start of the next billing cycle.
- Shift Billing Cycle: The customer starts the new plan immediately, and a new billing cycle begins from that date.
- Option 2: Fixed Billing Cycle with Future Start: The billing cycle starts on a specified future date, aligning with the configured billing period.
- Option 3: Fixed Billing Cycle Starts Immediately: The billing cycle starts immediately upon signup, based on the chosen billing period (e.g., weekly, monthly, quarterly, or yearly).
- Option 1: Start Immediately

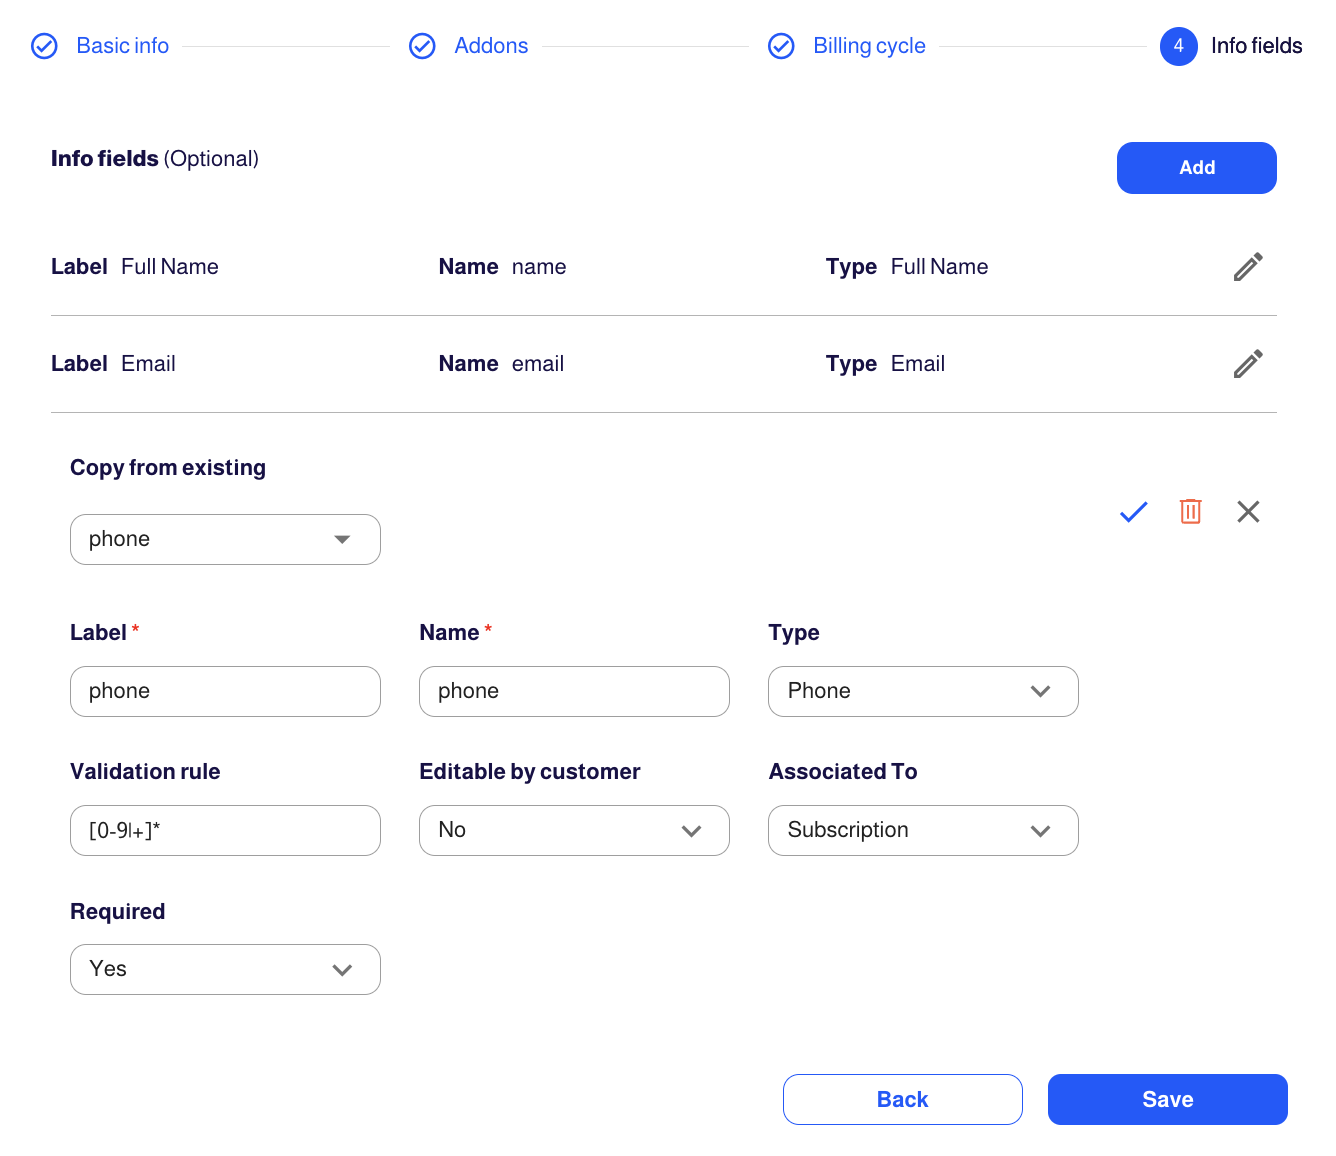
4. Specify Info Fields
- Add Info Fields: Specify the required info fields customers need to fill out during checkout.
- Types: Full Name, Email, Text, Date, Dropdown, Phone, Checkbox, Future Date Within/After, Past Date Within/Before. Learn more about these types here.
- Validation Rule: Set specific validation rules for the field, such as format or character limits.
- Editable by Customer: Specify if the customer can edit this field.
- Associated To: Link the field to either the customer or the subscription.
- Required: Indicate whether the field is mandatory for the customer to complete.

Review and Save
You can click "Back" to revisit and review the configuration settings before finalizing the plan. After reviewing, click "Save" to create the plan.
Manage your Plan Profile
Once the initial plan setup is complete, you can access the Plan Profile to further configure and refine the plan's details. The Plan Profile offers comprehensive information, allowing you to navigate through different tabs such as plan details, billing cycle, pricing, and more.
For more detailed information about creating and managing plans in Subsbase, please refer to Plans.