One-Time Payments
Overview
One-Time Payments offer a convenient way to bill your customers for one-time purchases that are non-recurring. These charges can include immediate purchases as well as cases where a customer is not associated with any specific plan subscription.
Create a One-Time Payment
Follow these steps to create a new 'one-time payment' link in your Subsbase site:
- Go to the One-Time Payments page in your Admin Portal, click the "Create One-Time Payment" button, and complete the Basic Info and Line Items sections.
- Once the 'one-time payment' link is created, explore various tabs in the One-Time Payment Profile to access or input additional information.
Basic Info
In the New One-Time Payment page, the first step is to enter the required Basic Info.
- The Name is required for the one-time payment that helps you identify the charge internally on your Subsbase site.
- The Code is a unique identifier automatically generated based on the internal Name you provide. You have the option to modify it during one-time payment creation, ensuring its uniqueness. However, once the one-time payment is created, the Code cannot be changed.
- Choose the desired Currency for charging your customers.
- Utilize the Comments field to include any additional details about the charge.
- By default, two required Info Fields (Name and Email) will be available, but you can add more through +Add.

Line Items
The second step is to specify the details of your Line Items.
- Item Name and Description that will be displayed in the checkout.
- Pricing Model: Choose your preferred Pricing Model in which you want to charge your customers.
- Price: You can specify the price for the charge's price point, based on the pricing model you chose.
- Discount: You can add discount(s), whether a fixed amount, percentage, or a combination of both.
- Extra Fees.

After creating the 'one-time payment' link, you can easily share it with your customer, enabling them to make a one-time payment throught the "On-Session Payment" feature.
Managing One-Time Payment Profile
Line Items
- Once you have completed the primary steps for creating a new one-time payment, you can proceed to open the One-Time Payment Profile and further configure additional details.
- Each One-Time Payment Profile offers a wealth of details. Navigation is facilitated through tabs at the top, including Line Items, Info Fields, Tax Settings, and Details.
- You can also delete the one-time payment using the "Delete" button.

Localization Settings
- You have the ability to translate line items in your one-time payments, allowing your customers to seamlessly switch between languages across the Admin Portal, Checkout, and Customer Portal pages.
- Any field marked with the localization icon can be customized to different languages.

- Click the icon to access the Localization Settings, where you can enter translations for each language.

To enable localization, admins must first set the site's language preferences in the Admin Portal under Site Settings > Language Settings. This step ensures that the Localization Settings work properly across all interfaces.
Info Fields
- In the Info Fields tab, you will find the fields configured during the creation of the one-time payment link.
- Additionally, you can add more fields using the +Add button, or adjust, or delete them.

Localization Settings
- You have the ability to translate info fields in your one-time payments, allowing your customers to seamlessly switch between languages across the Admin Portal, Checkout, and Customer Portal pages.
- Any field marked with the localization icon can be customized to different languages.

- Click the icon to access the Localization Settings, where you can enter translations for each language.

To enable localization, admins must first set the site's language preferences in the Admin Portal under Site Settings > Language Settings. This step ensures that the Localization Settings work properly across all interfaces.
Tax Settings
- Subsbase enables you to collect taxes on your invoices. You can choose how your one-time payments should be taxed by configuring the fields in the "Tax Settings" tab.
- The value/price that you quote for your product or service in Subsbase is set to Tax-Exclusive by default, where tax is applied on top of the product or service price.
- If you are integrating with an accounting software, make sure that you use the same "Tax Title" in both your Subsbase site and your account on that accounting platform.
- In the "Tax Settings" tab within the One-Time Payment Profile, you configure specific tax profiles that dictate how taxes are applied to invoices for that particular one-time payment.
You have two options:
- Choose a tax authority that you are integrated with.
- Select from the tax profiles you have configured through the "Tax Profiles" in Site Settings, if you are not integrated with any tax authority.
1. Integration with Tax Authority
- Subsbase has made it easy for you to configure and automatically apply taxes to your invoices through our integration with different tax authorities.
- You have the option to select the tax authority to which you are liable to pay taxes, from the "Integration Providers" dropdown menu.
- Once you have chosen the integration provider, you will need to configure the fields below. All the required information can be found on the account you created on the website of the respective tax authority.
- For more details, please check the Tax Invoicing page.
2. Tax Profiles
Configure Tax Profiles
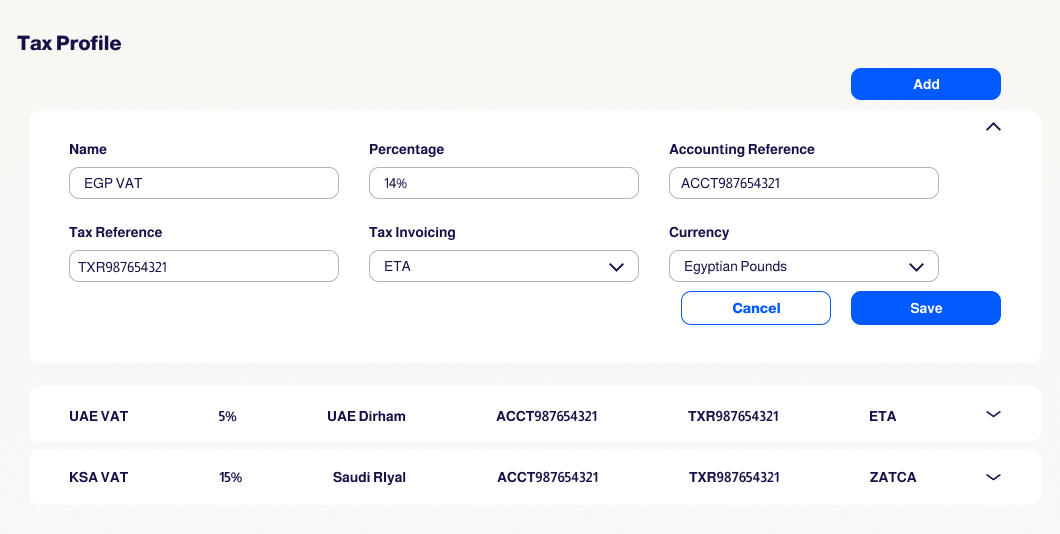
If you are not integrated with any tax authority, you can create and edit "Tax Profiles" in "Site Settings." This provides the flexibility to configure your site's tax profiles independently.
Choose Tax Profiles
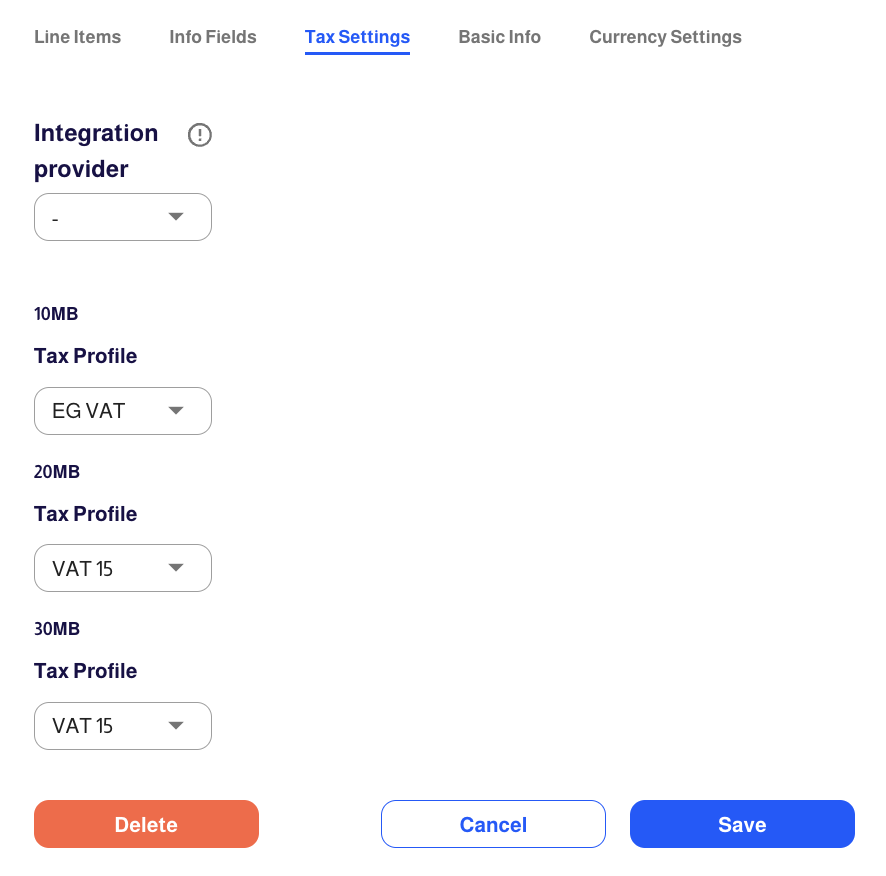
In the "Tax Settings" tab of the One-Time Payment Profile, you can select the tax profiles you want to apply to each line item of your one-time payment.
Basic Info
Narrative Template
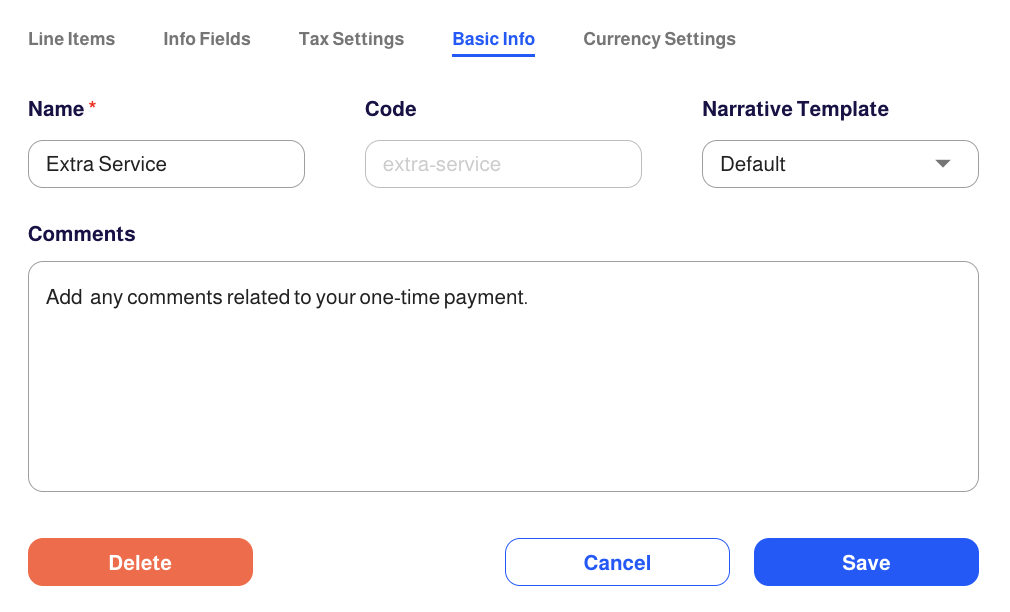
- In the "Basic Info" tab of the One-Time-Payment Profile, you can tailor the descriptive content of your invoices, such as payment terms and thank-you messages, by selecting a narrative template that fits your requirements.
- When setting up your one-time-payments, choose the desired template from the Narrative Template dropdown, which includes options you have configured in the Site Settings.
- Once selected, any invoices generated from these one-time-payments will automatically feature the chosen narrative. The narrative will appear in the Invoice's Narrative tab for your review.
Configure Narrative Templates in Site Settings
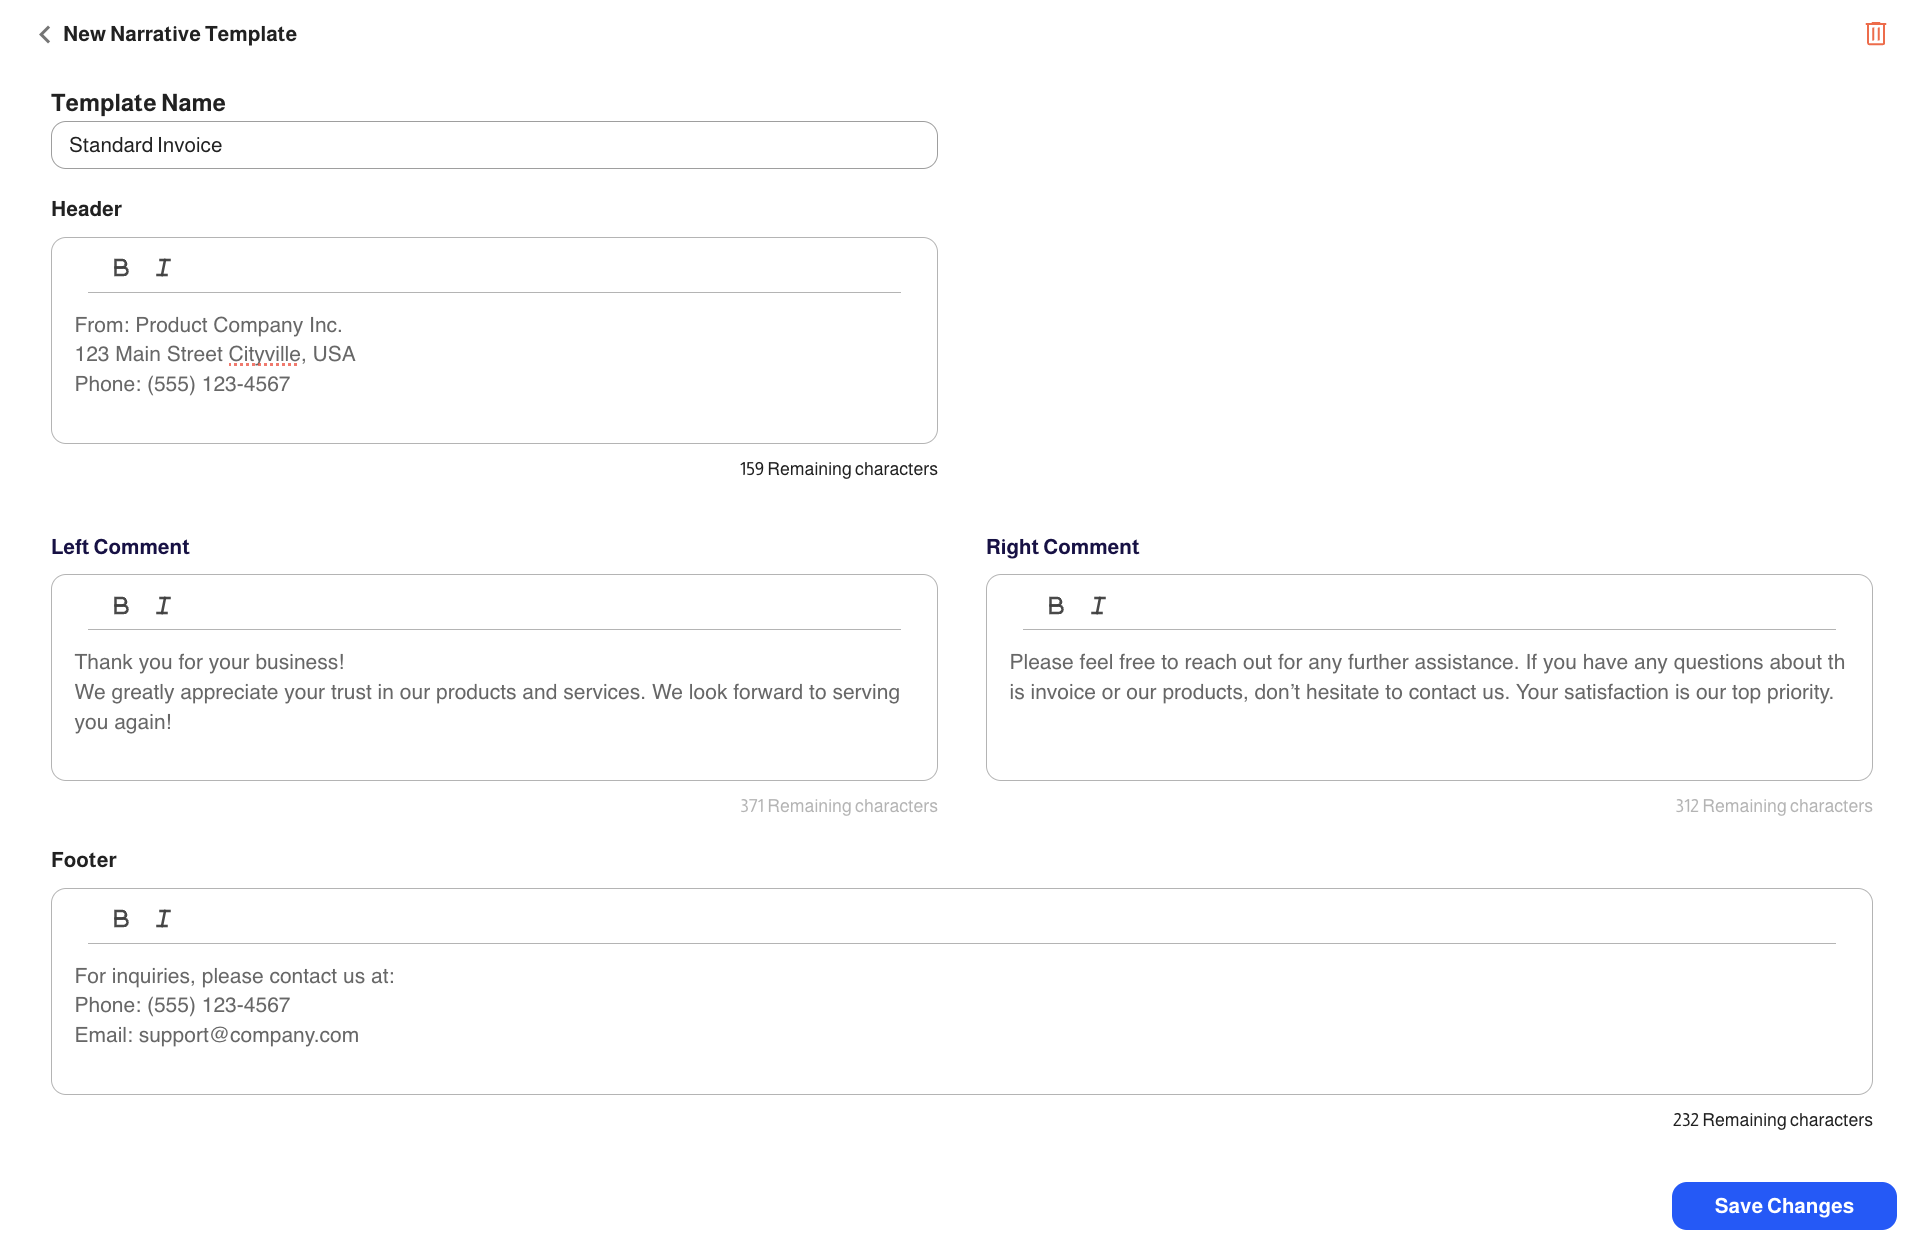
- Set up the Invoice Narrative Template in your Site Settings via the Admin Portal, or manage it using the APIs.
Localization Settings
- You have the ability to translate basic info in your one-time payments, allowing your customers to seamlessly switch between languages across the Admin Portal, Checkout, and Customer Portal pages.
- Any field marked with the localization icon can be customized to different languages.

- Click the icon to access the Localization Settings, where you can enter translations for each language.

To enable localization, admins must first set the site's language preferences in the Admin Portal under Site Settings > Language Settings. This step ensures that the Localization Settings work properly across all interfaces.
Currency Settings
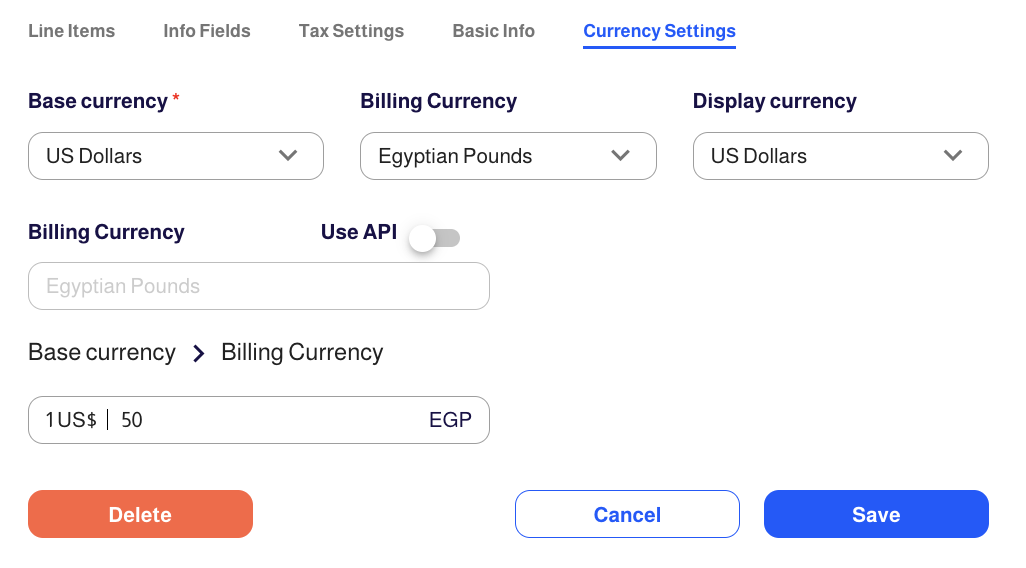
- In the "Currency Settings" tab of the One-Time-Payment Profile, you can configure the currency settings for your one-time-payment, including conversion rates between the one-time-payment's base currency and the billing or display currencies, by choosing between "Manual" and "Use API" for conversion rates via a toggle switch.
However, any configuration made in the "Basic Info" tab of the One-Time-Payment Profile will override the "Currency Settings" in Site Settings.
- The conversion rates only need to be configured when the one-time payment's billing or display currencies differ from its base currency.
On-Session Payment
- On-session payment refers to a payment processing flow in which the customer's card information is not stored or tokenized for future use.
- When a customer checks out and pays, their payment details are used only for that specific transaction, and the information is not retained by us.
Here is how the process typically works:
- Customer Checkout: When your customer makes a purchase on your website or through your app, they enter their payment details, such as credit card number, expiration date, and CVV, during the checkout process.
- Payment Authorization: The payment information is securly sent to the chosen payment provider to request authorization for the payment. The payment provider then contacts the card issuer (bank or financial institution) to request authorization for the transaction. Upon receiving the authorization response from the card issuer, the payment provider forwards this information back to Subsbase, indicating whether the payment is authorized.
- Invoice Creation: Once the payment is authorized, Subsbase generates an invoice that includes relevant purchase details, such as the items purchased and the total amount paid.
- Transaction Processing: If the card issuer approves the transaction, the payment provider proceeds to process the payment and transfers the funds to your account.
- Customer Profile Creation (for "One-Time Payment Link" first-time users): In the case of a customer using a "Payment Link" for the first time on Subsbase, a customer profile is automatically created for them. The profile includes default information required for a one-time payment link, such as the customer's name and email address. Additionally, Subsbase can collect any other necessary details from the customer, such as phone number or address, based on your specific requirements.
- No Tokenization: In an on-session payment flow without tokenization, the crucial distinction is that the customer's payment information (credit card number, CVV, etc.) is not stored or tokenized for future use. Tokenization involves replacing sensitive data with unique identification tokens that are meaningless to attackers even if intercepted. However, in this scenario, no tokenization is performed, and the actual payment information is not saved on our servers.
Listing Page Actions
Export CSV
By clicking the "Export CSV" button, you can view a comprehensive list of all payment links present on your site.
View Settings
Through the "View Settings" icon, you can customize the way your payment links list is displayed according to your preferences.
Actions
The Actions column provides three options for each one-time payment:
- Copy the one-time payment link
- Open the checkout for the one-time payment
- Delete the one-time payment link
Search and Sort By
Search
Payment Links can be searched by Name and Code.
Sort by
- You can sort payment links by Name, Status, or Invoice Currency.
- And by clicking on the arrows next to them, you can switch between ascending and descending orders.